Saturday, January 25

Handmade School Hair Ties

Not sure about your little treasure but my Rosie goes through lots of hair ties.

She also has lots of hair. 

Like me.

And it is often a struggle to get her to put it up for school, and for me to satisfy her inner-diva as she always wants it to look "amazing" and has a new style to try every week.

When I saw some ribbon at the local haberdashery shop [yes it's cute and very "Nanna"] that stocks all of our school uniforms, I thought I might have a go at making some school hair ties.

I checked on YouTube to find a tutorial about how to curl fabric ribbon, and it's really as simple as winding the ribbon around a stick and baking it!

So that's what I did.


I used a piece of bamboo garden stake I found in our yard supplies and cut it to size 
to fit on a baking tray. I wound the ribbon around the stick and used 
2 wooden pegs to fasten each end.

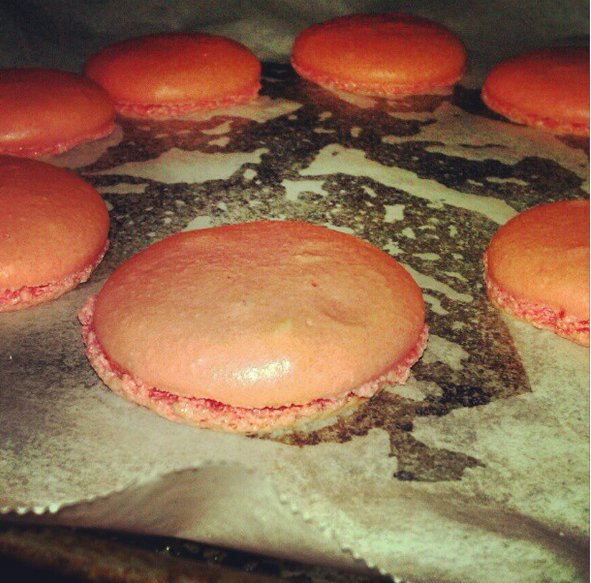
I placed it on the baking tray and baked at 200 degrees celsius for 25 mins.

After it has cooled you simply unwind it and your ribbon has a permanent curl.


Cut the ribbon into smaller lengths,  
put a few together and stitch them in the centre to fasten them.


I also made another design with some of the uncurled left over ribbon.


Then comes the attaching step.

You may choose hair ties or a clip perhaps to fasten your ribbons to,
but whatever you decide a hot glue gun makes easy work of it, messy but quick!


Once the glue is dry, that's it!


We tried them out and they passed the test . . .  she likes them!


Next time I might try a mixture of school colours.

Happy Sewing!

Thursday, January 23

Peasant Dresses


Searching the web as I do, looking for other crafty people from whom I might steal inspiration and ideas, I came across this great site . . .


Scattered Thoughts of a Crafty Mom.

She does it all, cooking, crafting, sewing, kids activities and homewares.

And FREE PATTERNS!

So once I saw the Peasant Dresses Pattern, I knew that I had to try it.

They are really very simple.

And I made a few . . .


So cute!

You can find the free pattern here.


HAPPY SEWING!

Sunday, August 18

60's House - Update

The renovations of our 60's house have slowed somewhat, 
as we let life take over and enjoy just living here.

Our house still needs a lot of work and being patient about this 
is not my strong point but it is a lesson I am learning  . . . slowly.

We have added and completed many tasks in the last year, 
one of the major ones being the front deck.

We completed it just before Christmas last year and I have loved
how it has changed how we use the space. Outside is now inviting 
and used often for twilight dinners or picinic lunches on the weekends.

I love how, when we open up the large glass sliding door from the 
lounge room to outside, the kids footsteps don't even miss a beat 
as they run through; playing and enjoying both spaces.


Rosie refuses to call it a deck, she corrects us and insists that it's
called a stage instead. And there has been many a concert performance
in the last year believe me.

I also love that we built it ourselves. Luke and his ever brilliant design,
me and my motivational, rose coloured glasses outlook - pushing forward
to make it happen. The kids helping and laying out planks, countersinking
the screw holes. It is all of our sweat that made it happen. And now we 
get to enjoy it. And I can honestly say I can build a deck. 

And as we slowly plod through the never ending list of jobs that will 
invertibley take us years to complete, we take pleasure in the small things.

Like this great fabric that came to us as a present and made just the right
kind of artwork for our vast bedroom wall. Just the right shade of grey and
ever so retro in it's colour and patterns.


We take pleasure in the small things and learn to wait for the rest.


Saturday, August 17

Making Macarons.

Ever since I had my first taste of a Macaron at the patisserie "French Twist" 
I have wanted to be able to make these tiny morsels of sweetness.

They come in so many different varieties but the one that for me, 
is the pièce de résistance: The Lavender with pistachio filling! 


Here it is, the best ever.
The Cherry Ripe one beside it wasn't bad either!

So on my search to replicate the Macaron, I discovered that they are often called a "Macaroon", which is an entirely different biscuit.

Macaroons are traditionally made from coconut and are sometimes finished 
with a glazed cherry or dipped in chocolate.


As I hunted for a recipe that didn't look daunting or overly complex I began to fear the difficulty level and talked myself out of giving it a go.

And then I came across this great YouTube demonstration and it seemed easy.


This recipe from Eugenie Kitchen 
 makes lovely macarons that have not failed me yet.
This recipe comes from
Le Cordon Bleu Culinary Arts School in Paris.
If they can't do a good Macaron - I have no chance!

I have passed this link onto a friend and she had a success too.

My attempts so far:

Pink colouring with a touch of strawberry flavouring makes them 
look good and taste even better!


Frilly feet are the key  . . . apparently!


 Strawberry with cream cheese filling and 
Nutella filled Blue Macarons.


 I do think you get better with practice!
These were my latest attempt - the best ones so far!

Mocha Macarons [Coffee biscuits and choc filling]
and Strawberry and Cream Macarons.

So yummy and really sweet to give away as treats.

Happy Baking!


Friday, August 16

Back in the swing . . .

Lately I have been able to squeeze in some sewing time 
[mostly late into the night] and it reminds me how much I miss making things.

These are all presents for Rosie's friends.


While these singlets are really very simple, I have found that kids 
just  love to have 
their "Letter" on a shirt. 
They make a unique and personal gift for kids and adults alike.


And these felt crowns are super cute!
So many colours and designs to play with.

Rosie has helped with each one, picking the fabric and the designs for the shirts.
She even helped stitch around the felt leaves. 

With any luck she'll be making the gifts for her friends birthday parties soon!


Monday, April 15

She is 5!


Our tiny girl, born the weekend after Easter, 5 years ago.


How she has grown. 

She is her own person, with her own ideas and desires.


We didn't have a birthday party last year so this year we went all out!

A Tea Party.
10 friends from her prep class.
Real china cups and teapots filled with pink lemonade.

A special day for a special girl.


 My Rosie Moo.

Love you beautiful girl.


Sunday, March 3

One Decade


  Luke and I celebrated our 10th Wedding Anniversary on Friday 1st March.

Married for 10 years.
Best friends first. 
 
We have been through a lot together, 
and we plan on going through a whole heap more.

And I can't wait.